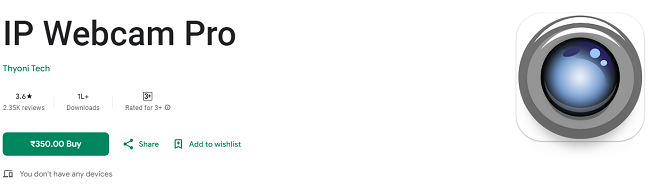
IP Webcam Pro for PC - Download on Windows & Mac
The IP Webcam Pro app is a powerful tool that transforms your smartphone into a high-quality security camera, streaming live video feeds to your devices. It's a versatile and efficient solution for home security, baby monitoring, pet monitoring, or any other surveillance needs. While the IP Webcam Pro app is primarily designed for Android, many users prefer to access it from their PC for a larger screen or enhanced functionality.
In this guide, we'll walk you through the steps to install and use the IP Webcam Pro app on your PC Windows and Mac using an Android emulator. Emulators simulate Android devices on your computer, allowing you to run apps that are otherwise restricted to mobile devices.
Why Use IP Webcam Pro?
Before we dive into the installation process, let's briefly discuss why you might want to use IP Webcam Pro on your PC. The app offers a range of features, including:
High-Quality Video Streaming: Stream HD video to your PC with minimal latency.
Motion Detection: Set up alerts for movement detection.
Customizable Settings: Adjust resolution, bitrate, and camera settings.
Cloud Storage Integration: Upload video footage to cloud services like Dropbox.
Multiple Viewing Options: View your live feed on any browser or compatible software.
The ability to run IP Webcam Pro on your computer offers a significant advantage in terms of larger display and enhanced processing power.
How to Download IP Webcam Pro for PC (Windows & Mac?
Prerequisites
Before installing IP Webcam Pro on your PC, you’ll need to set up an Android emulator. Two popular emulators that support a smooth IP Webcam Pro experience are BlueStacks and NoxPlayer. These emulators create a virtual Android device on your computer, enabling you to download and run Android apps directly on your PC.
Step 1: Download and Install an Android Emulator
Option 1: Installing BlueStacks
BlueStacks is one of the most popular and trusted Android emulators for PC and Mac. Follow these steps to install it:
Download BlueStacks: Go to the official website (https://www.bluestacks.com) and click the Download BlueStacks button.
Install the Emulator: Once the setup file is downloaded, open it and follow the on-screen instructions to install BlueStacks on your PC or Mac.
Launch BlueStacks: After installation, open BlueStacks from your desktop shortcut.
Option 2: Installing NoxPlayer
NoxPlayer is another powerful emulator that’s well-suited for running Android apps on your computer.
Download NoxPlayer: Visit the official NoxPlayer website (https://www.bignox.com) and download the installer for your operating system.
Install NoxPlayer: Run the installer and follow the on-screen instructions.
Launch NoxPlayer: Once installation is complete, open NoxPlayer from your desktop or application folder.
Step 2: Set Up the Emulator
After launching the emulator, you’ll need to set it up:
Sign in with Google Account: Both BlueStacks and NoxPlayer require you to sign in with a Google account (just like on a physical Android device) to access the Google Play Store and download apps. If you don’t already have a Google account, you can create one during the setup process.
Customize Emulator Settings (Optional): Adjust the display settings, performance settings, and other options to ensure the best experience for your PC setup. For most users, the default settings work fine.
Step 3: Install IP Webcam Pro on Your Emulator
Now that your emulator is up and running, follow these steps to install IP Webcam Pro:
Open Google Play Store: From the emulator’s home screen, locate and open the Google Play Store.
Search for IP Webcam Pro: In the search bar, type “IP Webcam Pro” and press Enter.
Download the App: Find the official IP Webcam Pro app developed by VMobiles and click Install.
Wait for Installation: The app will begin downloading and installing. Once complete, you’ll see the IP Webcam Pro icon appear on your emulator’s home screen.
Step 4: Set Up IP Webcam Pro
With the app installed, it’s time to set it up for use:
Open IP Webcam Pro: Click the app icon on your emulator's home screen to launch it.
Configure Camera Settings: The app will request access to your device’s camera. While you can’t use your PC’s camera, you can still set up the app on your Android phone and connect it to your PC for streaming.
Set Up Video Streaming: Follow the on-screen instructions to configure your camera settings, such as resolution, bitrate, and other features. For a basic setup, the default settings should work fine.
Access Camera Feed: Once set up, you can start streaming live footage from your smartphone's camera to your PC using the IP address or URL displayed in the app.
Step 5: View the IP Webcam Feed on Your PC
Once you’ve set up the IP Webcam Pro app, you can access the camera feed on your computer.
Obtain the IP Address: On your smartphone running IP Webcam Pro, note down the IP address displayed on the app’s screen.
Open the Browser: Open a browser on your emulator or PC and type in the IP address followed by the port number (e.g., http://192.168.1.2:8080).
Start Streaming: Hit Enter, and your live video feed will appear in your browser window or the emulator.
Step 6: Optional Advanced Features
IP Webcam Pro offers several advanced features that you can use to enhance your experience:
Motion Detection: Set up alerts that notify you of motion in the camera’s field of view.
Cloud Storage Integration: Connect IP Webcam Pro to cloud storage services such as Google Drive or Dropbox to store recorded video.
Custom RTSP Stream: If you're familiar with network streaming, you can configure the app to stream over RTSP (Real-Time Streaming Protocol) for use in other software or systems.
External Viewers: You can use software like VLC Media Player or any other compatible viewer to watch the live feed.
Troubleshooting Tips
While using an Android emulator to run IP Webcam Pro on your PC is straightforward, you might encounter some issues. Here are a few common problems and their solutions:
1. App Crashes or Freezes
Solution: Make sure your emulator is up to date. Sometimes, updating the emulator resolves issues with compatibility. You can also try clearing the cache or reinstalling the app.
2. Slow Performance
Solution: Adjust the performance settings in the emulator. Increase the allocated RAM or CPU cores to optimize performance. If your PC is underpowered, consider reducing the video resolution or bitrate in the IP Webcam Pro app.
3. Camera Not Recognized
Solution: Ensure that your smartphone's camera is working properly and that the IP Webcam Pro app has permission to access the camera. Additionally, double-check that your phone and PC are connected to the same Wi-Fi network.
4. Streaming Delays
Solution: If you experience a delay or lag in the video feed, try lowering the video resolution or bitrate. Also, check your network connection to ensure a stable and fast connection.
Conclusion
Using IP Webcam Pro on your PC (Windows or Mac) is a great way to take advantage of the app's powerful features on a larger screen. By following the steps outlined in this guide, you can easily install the app via an Android emulator and begin streaming your smartphone’s camera feed to your computer.
Whether you're setting up a security camera, monitoring your pets, or keeping an eye on your baby, IP Webcam Pro offers a reliable solution for live video streaming. The ability to run it on a PC gives you more control and flexibility, making it a valuable tool for many users.
With the right Android emulator, you’ll be able to access all the features of IP Webcam Pro on your computer and enjoy a seamless and enhanced surveillance experience.